Tutorial Name: Sega Saturn Battery pack
Platform: Sega Saturn
Tutorial Download: N/A
Pic: batpic4.jpg
Tutorial:
Sega Saturn Battery pack
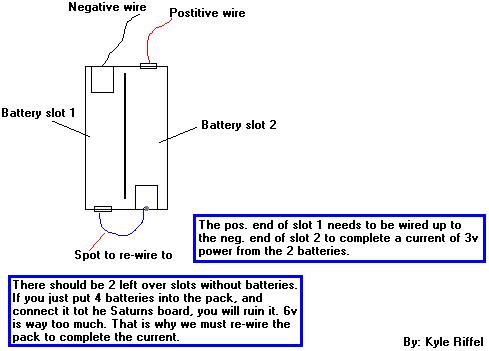
One note: I used a battery pack that had 4 battery inserts. Because of this, I had to re-wire the two slots connected to the pos. and neg., so the pos. of one battery went straight ot the neg. of the other battery, without going through the two other battery slots. If I didn't there wouldn't be any connection. For the connection to be complete, there would have to be 2 other batteries, which is 6v, too much for the Saturn to handle, w/o being broken, I think.
What you need:
1. AAA or AA battery pack, preferebly one that will only hold 2 batteries.
2. Soldering iron, and rosin core solder
3. Wire- from Saturn board to battery pack, about 6 in. for each pos. and neg. connection
4. Phillips head screwdriver
5. Solderless terminals- this is used to connect the already existing pos. and neg. wires that come from battery pack to the wires connected to the Saturn Board. Not needed if you just want to splice the wires together.
Here we go...
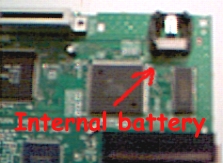
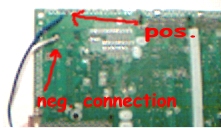
First, disassemble the system, and get down to the Saturns board. Note where the pos. and neg. points from the internal battery connect. My pos. was connected by the top of the board, under it, and the neg. not too far from there. But, thats just my system, not neccessarily yours.
Umm... take your wire, and solder it to the internal batteries points. Only use one of the pos. connections. The other is there for support.
If you have a 4 slot battery pack, you need to re-wire like it stated before you started. Look where the pos. wire is connected to on the battery pack. The neg. point of that slot needs to be wired to connect to what would be the pos. point of the other slot where the neg. wire from the battery pack goes. In other words...
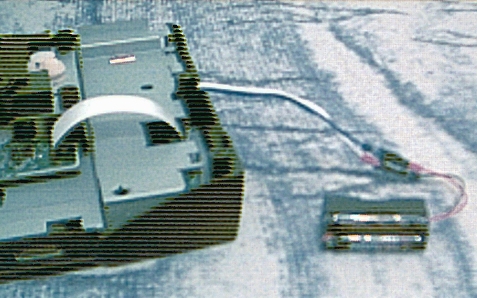
Now... we need to connect the wires fromt he board to the bettery pack. Either use solderless terminals like I did, or just splice the wires together with solder and electrical tape. Test this baby! This is what you should have...
If it doesn't work...
1. Check all solder points.
2. Make sure batteries are charged.
3. Make sure you didn't solder the wrong slots together on the battery pack.
4. Make sure your pos. and neg. points aren't crossed from the battery pack to the board.