Tutorial Name: PS2 Cathode Installation
Download: N/A
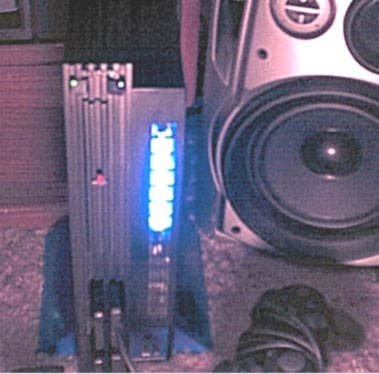
Pic: riva16_cathode.jpg
First of all:
My tutorials are not for people who know nothing about electronics... To use my tutorials, you'll need to know basic rules and terms... If I tell you to run the + to a point, realize that the ground will also need to be run... Thats basic... And my tutorials aren't in depth with pics every 2 sentences... They give you the basic platform for the mod you want to do... This makes it easy for poeple to be able to understand the tutorial, AND place the mod wherever they want it the system, NOT where I TELL you to... Of course... You can put them where I say...
This tutorial will help you install Cathode Tube lighting into your PS2... Cathode can be placed in the front vents of the PS2... or behind a window you may have modded into your system. They are bright and look awsome! Be careful with handling the cathode tube! They can break easily! This tutorial will show you how to mod a cathode into the system, and placing the 4in. tube in the front vents...
What you will need:
1. PlayStation2
2. Soldering iron and solder
3. Cathode Tube (CCFT) 4in. prefered...
4. 12v Cathode Inverter (Power Supply)
5. Phillips head screwdriver
6. Superglue
7. Black Tape
First Things First:
This tutorial requires bending metal in the Expansion Bay in the front of the system to securely house a cathode tube... I do not know if this bending will interfere with a HDD.
I advise you go to www.allelectronics.com and order a 4in. cathode tube... (search CCFT), and a 12v inverter to power the cathode tube... They have many colors to choose from... Its only around $13 for the two. A 4in. tube is prefered becuase it will be easier to fit...
The idea for cathode is simple... We solder the leads (+ and -) to the PSU, which so happems to put out 12v, run them to the + and - of the inverter, and then plug the cathode tube into the inverter, route the wires around stuff and mount the cathode tube where you want... Seems easy? It is... More than I thought when I did it myself... :)
It just so happens a 4in. cathode tube fits perfect in the front vent NOT by the USB, but in front of the Expansion Port opening! Why won't it fit by the USB ports? Well, the shaft where the screw that holds the system together gets in the way! It still looks awsome though!
Here we go...:
Alright, it's about time I started this thing! If your confused from the top part, I don't blame you... You won't be though...
Start by removing the rubber and plastic coverings hiding the screws that hold the PS2 together. Remove the screws... Remove the top while being cautious of the ribbon for the "reset" and "eject" buttons. Remove the "reset" and "eject" buttons from the top panel... Remove the memory card ports, and the back panel with the plug and fan in it... CAREFULLY flip the system over... The fan is still connected! Remove the bottom panel... There, the system is effectively broken down. :)
Remove the four (4) screws holding the the PSU to the system... Remove the PSU, and the Expansion Bay metal slide. The Expanion Bay's metal slide will actually touch the front vent and crush the cathode upon re-assembly IF we don't bend it! We need to simply bend the piece that goes to the front, back about a 1/2 in. or so... enough to let the width of the cathode tube fit... I don't know if bending this interferres with the holding of a HDD or not... Upon writing this tutorial I do not have a Network Adapter or HDD for my PS2...
If you bought your cathode AND inverter from allelectronics, you should sefely be able to solder the + and - for the inverter to the PSU, and house the inverter as close to the cathode as you can without seeing it... Where you house the inverter is your choice... Where you install the cathode is also your choice... Make sure to use the black tape and insulate the entire inverter so it won't short out by touching something by accident!
Powering the Cathode Tube:
Take the PS2 PSU, and flip it over so the solder points are up, and all the soldered on devices face the floor... Face the output jack torwards you... (The output jack is where the two 12v lines plug into the PS2 board). There should be 4 points... The two left points are 12v +, and the two right points are 12v -. Simply solder the + wire to the far left, and the - wire to the far right solder points... Easy as that.
Simply place the inverter where you want, and plug in the cathode to test it out!
Mounting the Cathode:
This can be tricky... Using super glue, apply the glue to the black parts on each tip of the cahode tube. TRY to stay away from applying glue on the actual white tube itself! May cause damage! Once the tube is glued on, route the white cables around until everything fits snug... Place the inverter somewhere safe... I suggest you place the inverter on the main heat sink on top, close to the fan for cooling... OR under the PSU by the fan... Keep the inverter cool, and the cathode will stay cool. I've had my cathode installed for awhile before writing this, and both the inverter and cathode tube stay cool anywhere you place them... Keeping the inverter closer to the fan helps more though... At this point, everythings up to you... Place the cathode in a good spot... BUT, be careful that nothing will interferre with the tube... Example... There are screw shafts that might get in the way... The metal slide for the Expansion Bay, if not bent, will crush the tube upon reassembly... The weight of the Motherboard and PSU together may break throught he black tape and short! Be careful!
Here's my cathode tube!:
It Isn't Working:
1. Check all solder points
2. Check polarity (+ and -)
3. Check the PSU points... (+ and -)
4. Check for operational inverter or cathode
Good luck!!!
E-mail me with quesions and pics on your mod!!! synthetic_ky@hotmail.com